Explanations & Tutorials
Alexa Skills Kit Tutorial - Building Custom Skills with Alexa
Build your first custom skill in just 10 minutes (no programming experience required) with this Alexa skills kit tutorial.
Build your first custom skill in just 10 minutes (no programming experience required) with this Alexa skills kit tutorial.
Amazon Echo was one of the best-selling products and most asked for gifts last holiday season. While these devices are undoubtedly popular, recent reports on AI-powered voice assistants show that once the novelty rubs off, people don’t see much value in them. In fact, more than two-thirds of the Alexa skills have zero or one customer reviews, and just 3% of the users remain active on the app during their second week.
While these statistics point to the immaturity of the ecosystem, the continued popularity of the Echo suggests that users can find better uses for Alexa with the right custom skills — no need to wait until everything becomes Alexa-enabled (a trend we saw at CES 2017).
So here at Leverege, we decided to put together a simple Alexa skills kit tutorial for a custom skill that you may actually find useful.

One of the most difficult decisions we make on a day-to-day basis, is deciding what to eat for lunch. I mean there’s even a “How to Solve the ‘Where Should We Eat?’ Argument Once and For All” article on LifeHacker. As creatures of habit, the truth is that our lunch options are fairly limited. So just by asking Alexa for a type of cuisine, the time to figure out where to eat can be significantly reduced!
The following tutorial will make no assumptions about your programming ability. This quick 10-min guide is for anyone looking to make your Alexa device more useful. Even if you don’t have an Echo, you can follow along and simulate the skill using https://echosim.io/. If you’re a developer, feel free to skip around and jump straight into alexa-app documentation.
*** During my research, I found a public app called Lunch Suggestions. So if you are real lazy, you can just enable the skill. If you want to customize it or learn how to build your own app, please proceed.
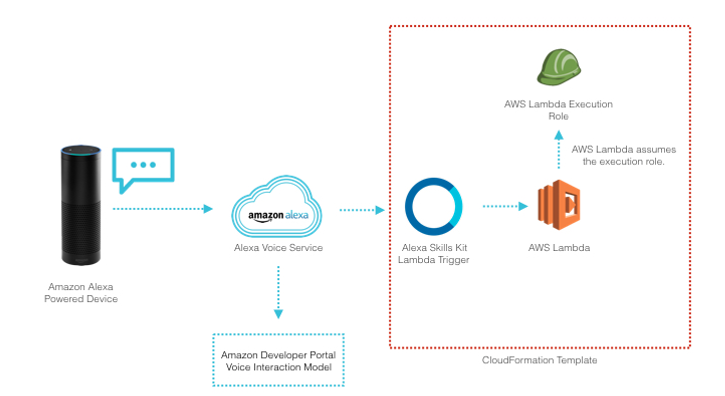
When you ask Alexa for something, it triggers an Alexa Skills Kit, which is often linked to AWS Lambda to execute the code. So before we get to write any code, we need to get an Amazon Developer Account and set up our cloud.
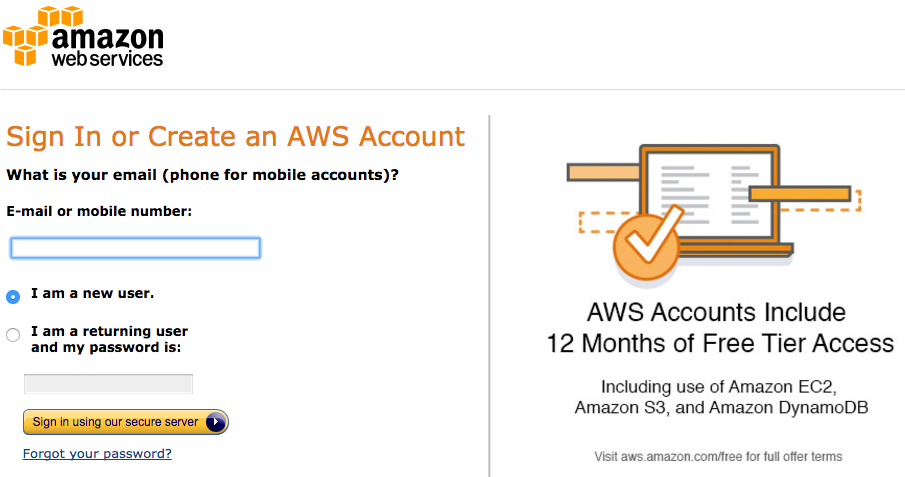
Head over to https://console.aws.amazon.com/lambda/home?region=us-east-1#/create?step=2 to sign in or create an AWS account (Note: Getting an AWS account might take a while as our reader J pointed out):

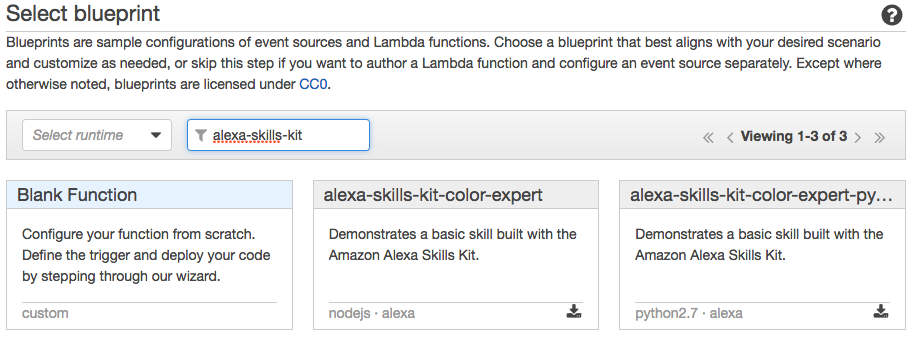
3. Under Select Blueprint, search for alexa-skills-kit-color-expert and choose that blueprint. We are going to use node.js version, not python 2.7 (the middle one).
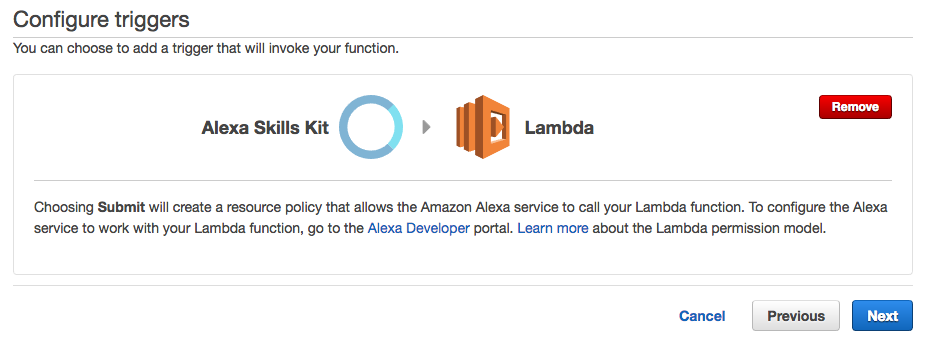
4. Click next as Configure triggers should already be preset.
5. Now give your function any name (e.g. myLunchApp)

6. Scroll down to Lambda function handler and role. You may already have ‘service-role/BasicExecutionRole’ or you may scroll the dropdown menu to ‘lambda_basic_execution’. If you find none of these options, refer to https://developer.amazon.com/blogs/post/TxDJWS16KUPVKO/new-alexa-skills-kit-template-build-a-trivia-skill-in-under-an-hour for IAM role setup.

7. Click Next and Create Function to finish the setup!
8. Note the ARN on the top right as we will need this later
With our AWS Lambda instance setup, now it’s time to start programming! This guide assumes no programming experience or setup, so even if you’ve never used terminal, git, or node, you can still follow along!
First, we must download Node.js to start writing our custom app. You can open terminal by doing a spotlight search. Now type the following:
node -v
If it returns something similar to v6.9.1, you already have node.js installed. If not, follow the instructions on https://nodejs.org/en/download/ to download node.js.
Next, we will create a new folder for our project under Documents folder.
cd ~
cd Documents
mkdir AlexaApp
cd AlexaApp
Type those four commands in sequence. In essence, we changed into the Documents folder, created a folder named AlexaApp and switched into the folder.
Now we will initialize our folder. This command will create a file called package.json to store a record of the libraries we use.
npm init -y
We will use a library called alexa-app to help abstract away the underlying magic with Amazon’s Alexa API.
npm install --save alexa-app
Once the install is finished, you should see something like:
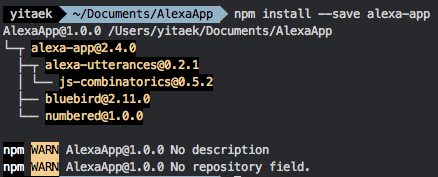
Now we will create a file called index.js and open it in a text-editor:
touch index.js
open index.js
In your text editor, copy the following code and save:
var alexa = require('alexa-app');
var app = new alexa.app();
app.launch(function(request, response){
response.say("Hello there, I am a bot created to help you find what to eat for lunch.");
response.shouldEndSession(false);
})
app.intent('GetLunchSuggestions',
{
"slots": {},
"utterances": [
"what's for lunch",
"where should {I|we} go for lunch"
]
},
function (request, response) {
generate_suggestions(response);
return;
}
);
function generate_suggestions(response){
var food = ["Thai",
"Sushi",
"Chik-fil-a",
"Smash Burgers",
"Uncle Julio's"
];
var rand = food[Math.floor(Math.random() * food.length)];
response.say("How about some " + rand + " today?");
response.send();
return ;
}
// Connect to lambda
exports.handler = app.lambda();
if ((process.argv.length === 3) && (process.argv[2] === 'schema'))
{
console.log (app.schema ());
console.log (app.utterances ());
}
To break down the code, I’ll give a high-level overview of what’s happening in each block:
app.launch provides an introductory message to our user. You can customize anything inside response.say to your own welcome message.
app.intent will be used by AWS Skills Portal to decipher our user’s intent (which is GetLunchSuggestions in this case) and possible things the user might say to ask Alexa for our intent.
generate_suggestions randomly picks a cuisine type under the variable food (which you can customize for your preferences) and outputs a suggestion.
Now type the following in the terminal to generate our intents and utterances:
node index.js schema
It should generate something like:
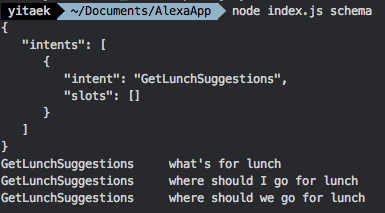
Inside your AlexaApp folder, now create a .zip file compressing all of the files (index.js, package.json, and node_modules). You are now ready for the final step!
Go to https://developer.amazon.com/ and sign in with the same Amazon account the Echo is linked to (most likely your default Amazon account).
Click on the Alexa tab and Alexa Skills Kit Get Started button:
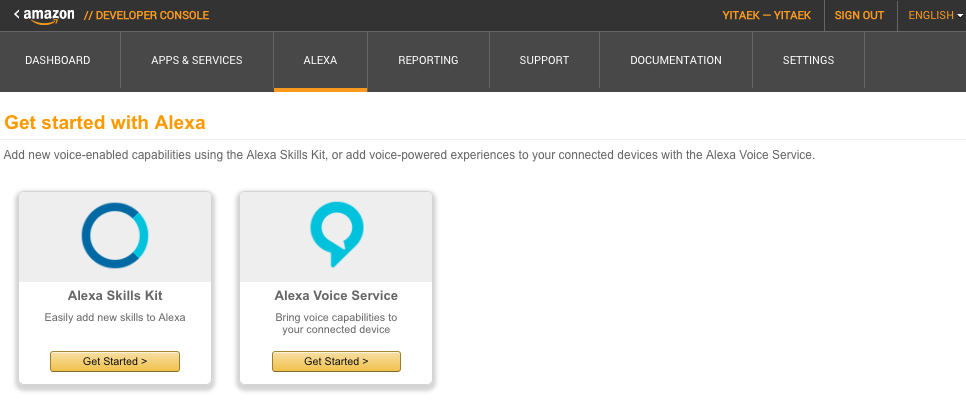
On the top right, click on the yellow box Add a New Skill
Now give the app any name (e.g. MyLunchApp) and an invocation name. This is the phrase you will use to wake up Alexa and use the skill. I called mine Lunch Picker.

In the Interaction Model, copy and paste the Intent Schema and Sample Utterances generated by our code in the earlier section.

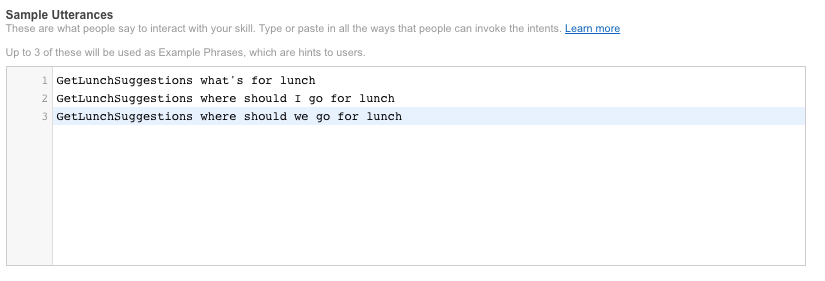
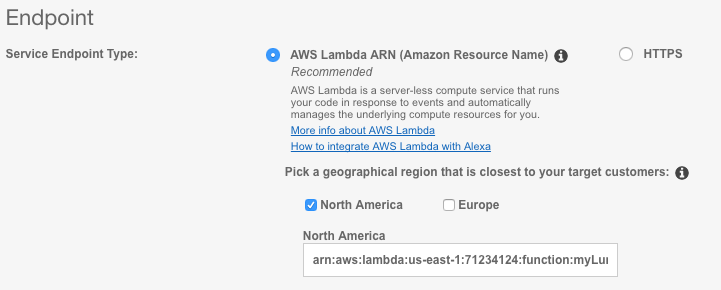
Under Configuration, choose AWS Lambda ARN and North America. In the text box, copy paste the ARN from our AWS Lambda setup that we noted earlier.
Now let’s switch back to our AWS Lambda tab and locate Code. Then change the Code entry type to Upload a .ZIP file and upload our code.

Make sure to hit Save.
Finally, go back to your Amazon Developer Portal and under Service Simulator, type in our sample utterances (e.g. “What’s for lunch”):
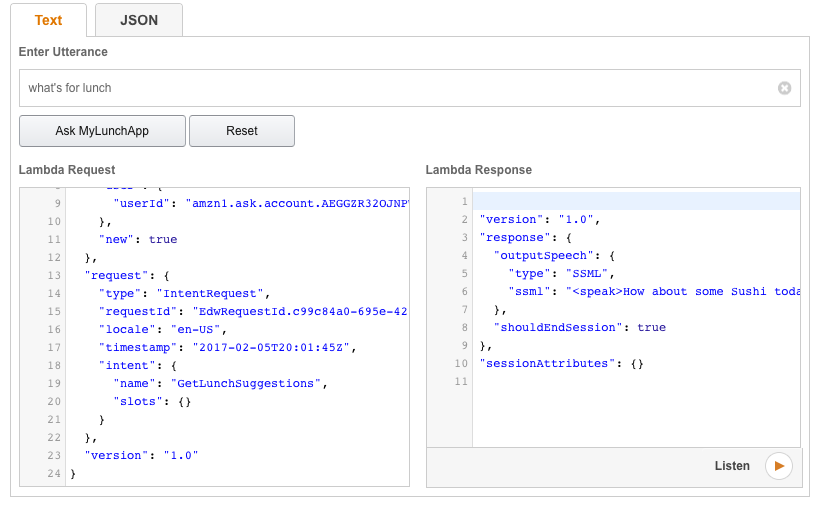
You can click the Listen button to hear what Alexa would say.
If there were no issues up to this point, you can now test this on your Echo or echosim.io!